4 min read
How to Make a Facebook Album Promoting Your Remodeling Project
By: Danielle Russell on Oct. 28, 2020

Facebook is one of the most powerful tools for reaching your target audience. As a remodeling business, you already know by now how important social media marketing is for promoting your business. But if you're looking for an extra step that will really set you apart, you should consider Facebook albums.
Why Facebook Albums Are a Great Promotional Tool for Your Remodeling Business
It is now harder than ever before for a post on Facebook to be seen by someone following your Page. Reach has dropped to roughly 2% according to Facebook's own announcements, and it will only continue to drop.
One of the best ways to fight this decrease in viewership, however, is to post the right content that users want to see. The kind of content that not only generates likes, comments, and shares but also elicits emotion. Posting Facebook albums is one of the best ways to do just that.
A Facebook album tells a story. The imagery is more than just a picture - it is a behind the scenes look at your daily office life. Or maybe it's a time-lapse of a project you're working on. Maybe it's a completed project with a testimonial from the homeowner you worked with to realize their home dreams.
When a Facebook album is created, it is automatically shared in your News Feed, along with other Facebook interaction posts. A great way to increase its reach from here is to tag the homeowners (with their permission), geo-tag your location of the project (or just check-in at your office), and to tell a story worth reading when sharing. But how do you make the perfect Facebook album?
How to Make a Facebook Album that Your Audience Will Love
Making a Facebook album is very quick and easy. The trick is to make sure it tells a story, encourages engagement, and is share-worthy.
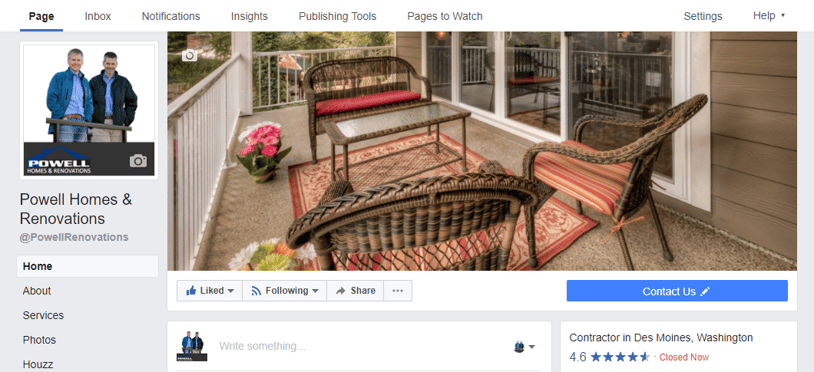
Step 1: Find Your Photos Section
Within your Facebook company page, you will be able to navigate from the left-hand menu to Photos. From this view, you can access your Facebook albums to modify any existing project albums that you can improve after this tutorial.
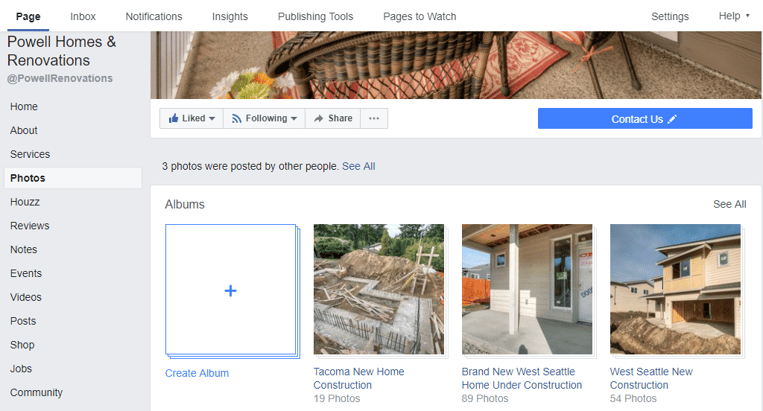
Step 2: Create a New Album
From this view, you can simply click on the + symbol to create a new album.
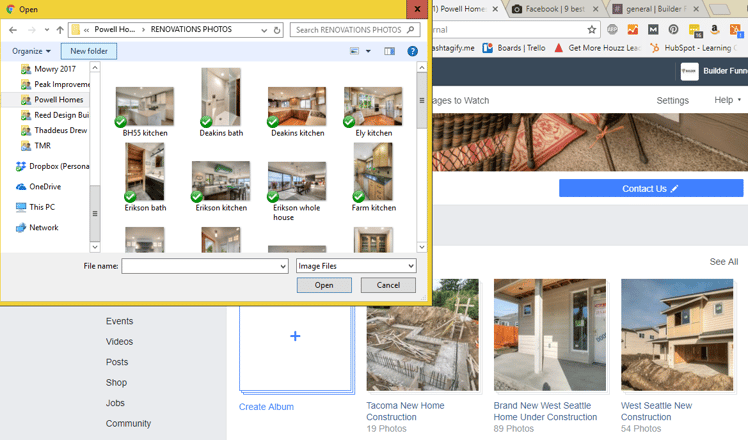
Step 3: Select the Right Photos
Upon creating a new Facebook album, Facebook will pull up your recently used folders. Whether you keep your imagery a synced DropBox folder that you can access or directly on your computer, you can easily add them to your album. Select all the images you would like to use for this album.
In this particular example, the purpose of the Facebook album is to encourage our followers to act before the holidays by mentioning the pain points of a home when hosting. In order to drive the point home, the imagery selected will be of recently remodeled kitchens and bathrooms.
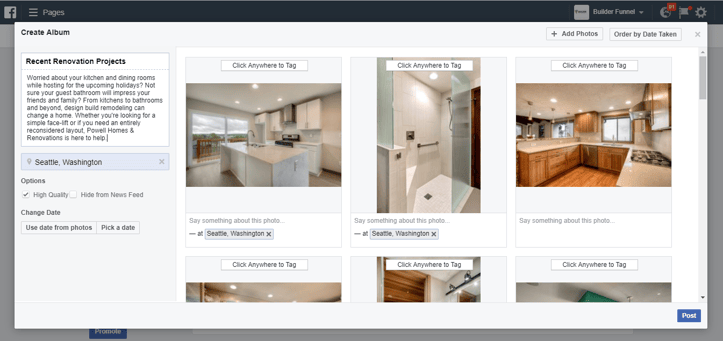
Step 4: Create Helpful and Relevant Title, Description, and More
Title: The title of your Facebook albums is key. It is easy to come up with something catchy, but when a potential user is trying to find it again after the post has cleared from their News Feed, it may be hard to find. It is important to keep the title simple to remember and relevant to the content.
Description: The description of the album is the perfect place to tell a story. In this example, we use the opportunity to elicit emotions. Everyone can understand the pain of hosting Thanksgiving in a too-small kitchen or having family stay from Christmas to New Years with an outdated guest bathroom. Take the opportunity to really craft a powerful description.
Location: Any business page or city that has a Facebook page will populate as you start to type in your location. You can either use this opportunity to check in to the city in which the remodeling project took place (in this case, Seattle) or you can check in to your own business page. The benefit to checking in to a city, however, is that your post has the chance to show up in local searches on Facebook.
Photo Descriptions: Each image has an opportunity to tell a story as well. You can caption each image you upload to a Facebook album. A great way to boost engagement on your Facebook albums is to post questions as your captions to encourage people to leave comments in response. If you don't have the time to do so, focus on the album description instead. If you have powerful, professional imagery, that will speak for itself if you have a great album description.
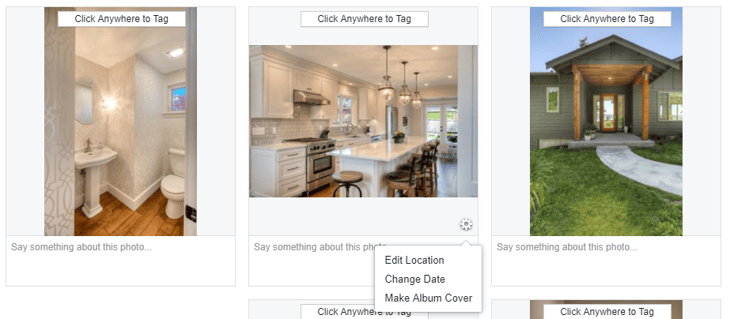
Step 5: Choose an Album Cover Photo
This image is the first thing Facebook users will see. It should be the most stunning and emotional photo you have in the entire album in order to gain that coveted click to open and see more. Select the dial in the bottom right corner of the right image and select "Make Album Cover." In our experiences, kitchens and living rooms gain the most views.
Keep in mind that in a world of decreasing organic reach, Facebook albums are one of your best social media strategies to fight back. People love imagery. They love stories. And they remember both. Take your time when building your albums, and be sure to consider what will gain engagement like views, clicks, likes, comments, and shares. Posts with high engagement signal to Facebook that your company page is relevant and resourceful, factoring in to your overall Facebook algorithm and allowing you to show up in more News Feeds.
Step 6: Post When Your Followers Are Online
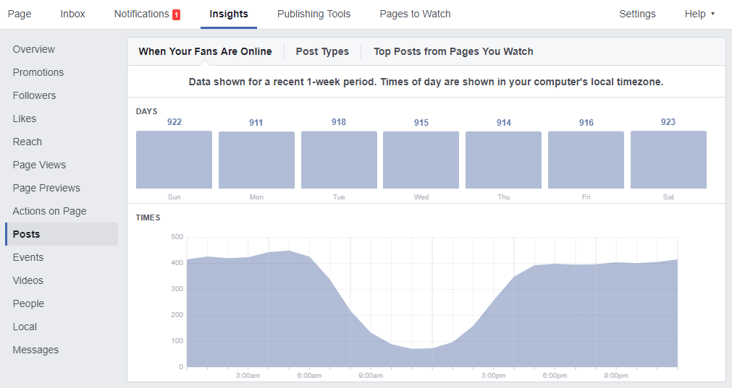
While posting the perfect album is important, so is making sure your viewers are there to receive it - and quickly. The Facebook algorithm includes a time component: the quicker your post gains views and engagement then the more relevant it is. Posting at the perfect time means understanding when your followers are normally engaging with your posts.
In order to find a good time to post, check out your Facebook company page Insights. Under this tab, you'll learn more about your audience, including when they are most active on your page. Posting at the right time is a trial and error process, but Insights will help you better align with when viewership is highest. Using the above image as an example, 7am or 8am might be a good time of day to post, or maybe later on the evening when viewership spikes again.
Once you have filled out all the relevant information to build a great Facebook album and have selected your album cover, you can click "post" to publish it.
Still have questions around Social Media Marketing? Feel free to reach out to us any time!


